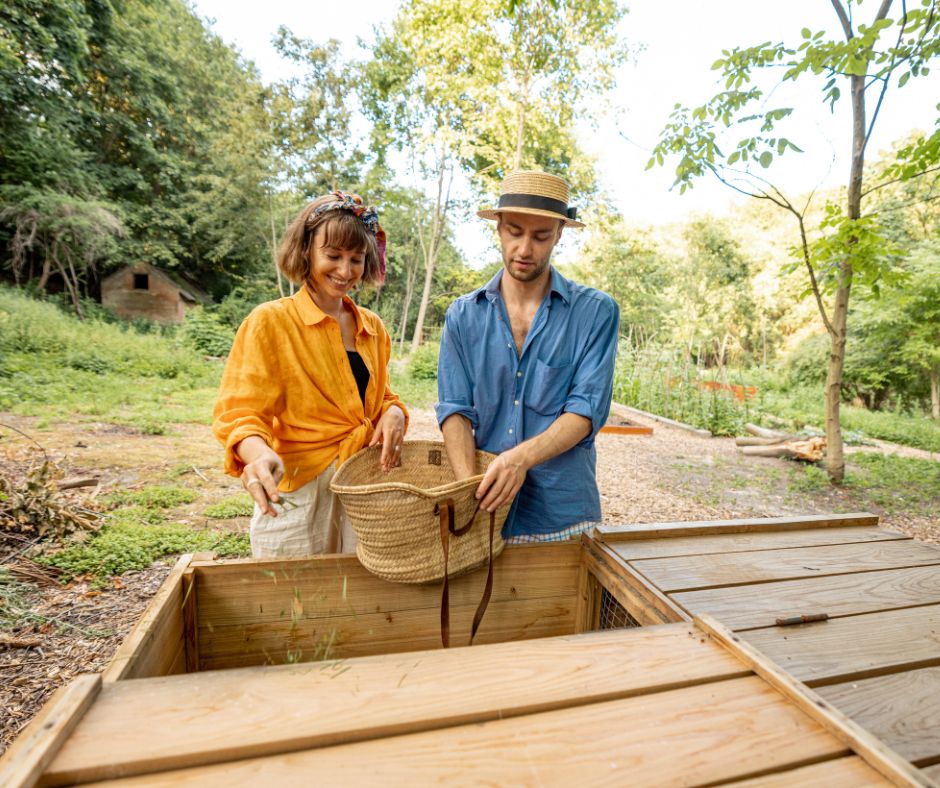
How to Make a Composter: 4 Different Ways
If you’re looking to reduce waste and create nutrient-rich soil for your garden, making your own composter is a fantastic option. By following a few simple steps, you can easily create a composter that will transform your kitchen scraps and yard waste into a valuable resource. In this article, we’ll guide you through the process of how to make a composter, from choosing the right materials to assembling it effectively. Get ready to turn your trash into treasure and make a positive impact on the environment all at once!
Understanding The Basics
Different types of composters
When it comes to composting, there are several different types of composters to choose from. Each type has its own advantages and disadvantages, so it’s important to consider your specific needs and preferences before making a decision. Some common types of composters include basket-style composters, tumbler-style composters, bin-style composters, and underground composters. Each type has its own unique design and functionality, so be sure to do your research and choose the one that best suits your composting goals.
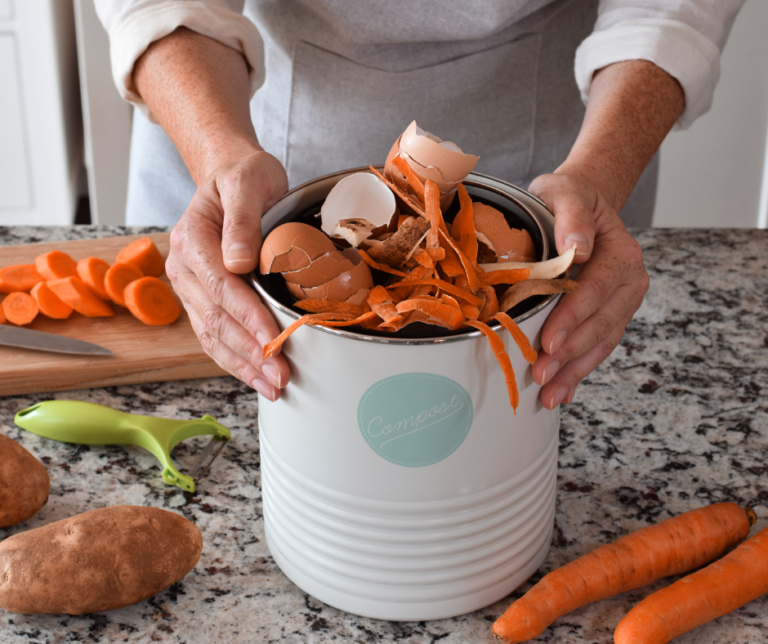
What items you can compost
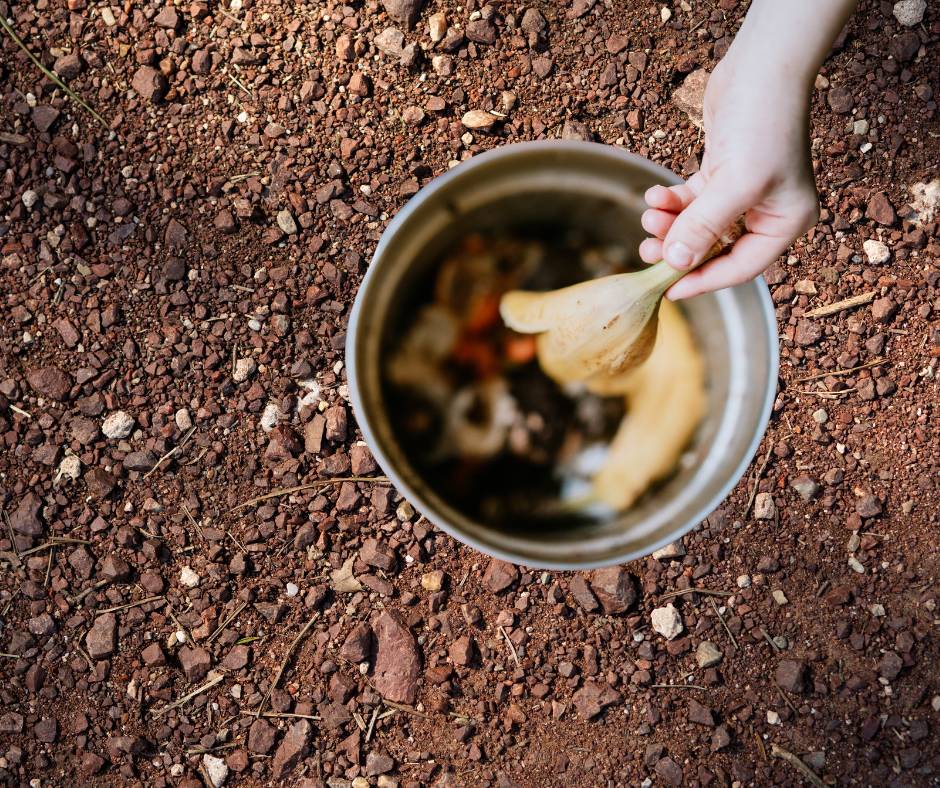
Composting is a natural process that breaks down organic waste materials into nutrient-rich compost that can be used to enrich soil. But what exactly can you compost? The answer is, a lot! Most organic materials can be composted, including fruit and vegetable scraps, coffee grounds, eggshells, yard waste, and even small amounts of paper products and cardboard. However, it’s important to avoid composting meat, dairy products, and oily foods, as these can attract pests and slow down the composting process. By following a few simple guidelines, you can ensure that your compost pile is filled with a variety of organic materials that will break down into rich, fertile compost.
Benefits of composting
Composting offers a wide range of benefits, both for the environment and for your own personal use. First and foremost, composting helps to reduce the amount of organic waste that ends up in landfills. By diverting this waste into your compost pile, you can help reduce greenhouse gas emissions and reduce the strain on landfill space. Additionally, composting allows you to create your own nutrient-rich soil amendment that can be used to improve the health and fertility of your garden soil. Compost can help retain moisture, suppress weeds, and provide essential nutrients to plants, making it an excellent natural alternative to chemical fertilizers. Plus, composting can be a fun and rewarding hobby that allows you to connect with nature and contribute to a more sustainable future.
Choosing The Right Location For Your Composter
Considering sun exposure and climate
When choosing the location for your composter, it’s important to consider the amount of sunlight and the climate in your area. Most composters thrive in a location that receives at least some direct sunlight each day, as the heat helps to promote the breakdown of organic materials. However, if you live in a particularly hot climate, you may want to choose a location that provides some shade during the hottest parts of the day to prevent your compost from drying out too quickly. It’s also important to consider the amount of rainfall and the drainage in your chosen location, as too much moisture can lead to a soggy, smelly compost pile.
Ease of access
Another factor to consider when choosing the location for your composter is ease of access. You’ll want to choose a location that is easily accessible so that you can add organic materials to your compost pile on a regular basis. Ideally, your composter should be located near your kitchen or garden, making it convenient to transfer kitchen scraps or yard waste directly to the compost bin. This will save you time and effort when it comes to maintaining your compost pile and ensure that you stay motivated to continue composting.
Evaluating appropriate space size
The size of your compost pile will depend on the amount of organic waste you generate and the available space in your chosen location. It’s important to choose a location that can accommodate the size of composter you plan to build or purchase.
Basket-style and tumbler-style composters are generally smaller and more compact, making them a good option for those with limited space.
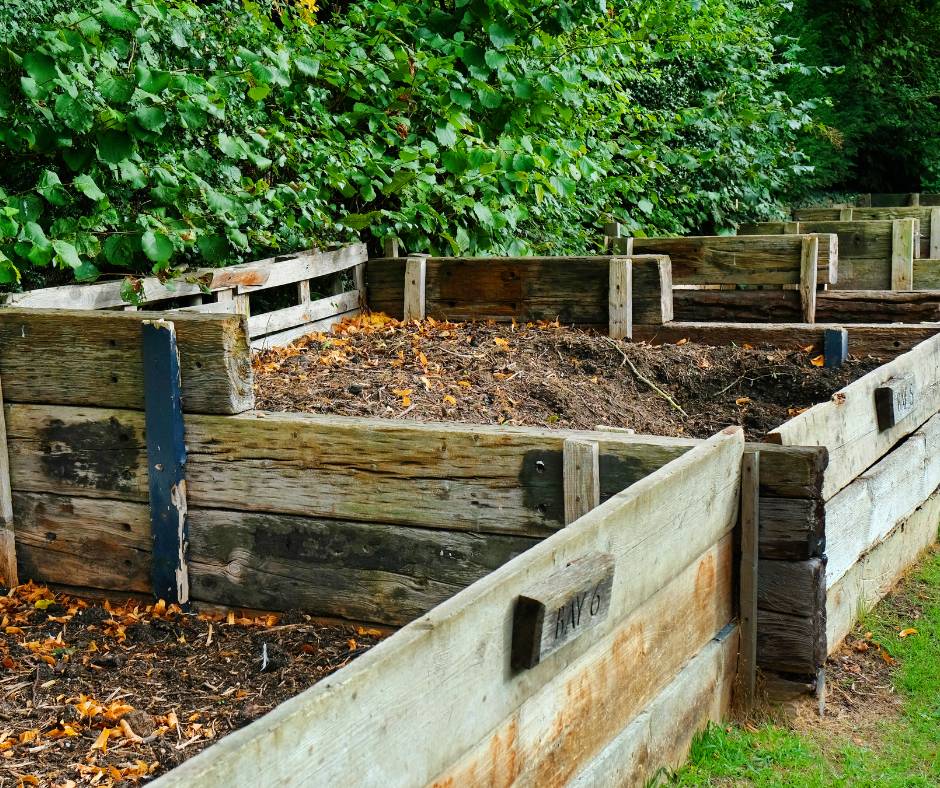
Bin-style composters can vary in size, depending on the number of compartments and the size of each compartment.
Underground composters require a larger area and may not be suitable for smaller yards. Consider the space you have available and choose a composter that fits your needs.
Proximity to home or garden
Lastly, consider the proximity of your chosen location to your home or garden. If you plan to use the compost in your garden, it’s important to have the compost pile located near your garden beds for easy access. This will make it convenient to transport the finished compost to your garden and apply it to your plants.
Additionally, having the compost pile located close to your home will make it easier to monitor and maintain, ensuring that you stay on top of regular composting tasks. Choose a location that is within a reasonable distance from your home or garden to make the most of your composting experience.
Essential Materials And Tools
Composter materials
The materials you’ll need to build a composter will depend on the type of composter you choose to construct. However, there are some common materials that are often used in the construction of composters. These include:
Some composters also require additional materials such as a composting liner or a base to keep the compost off the ground. Be sure to check the specific construction plans or instructions for your chosen composter design to determine the exact materials you’ll need.
Necessary tools for building a composter
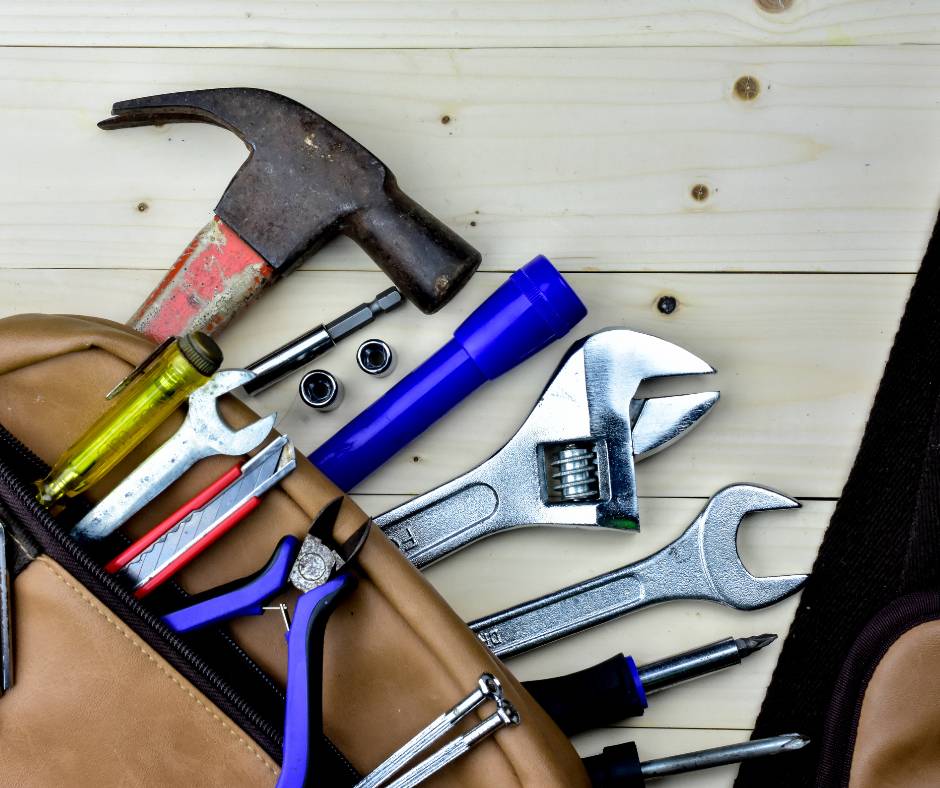
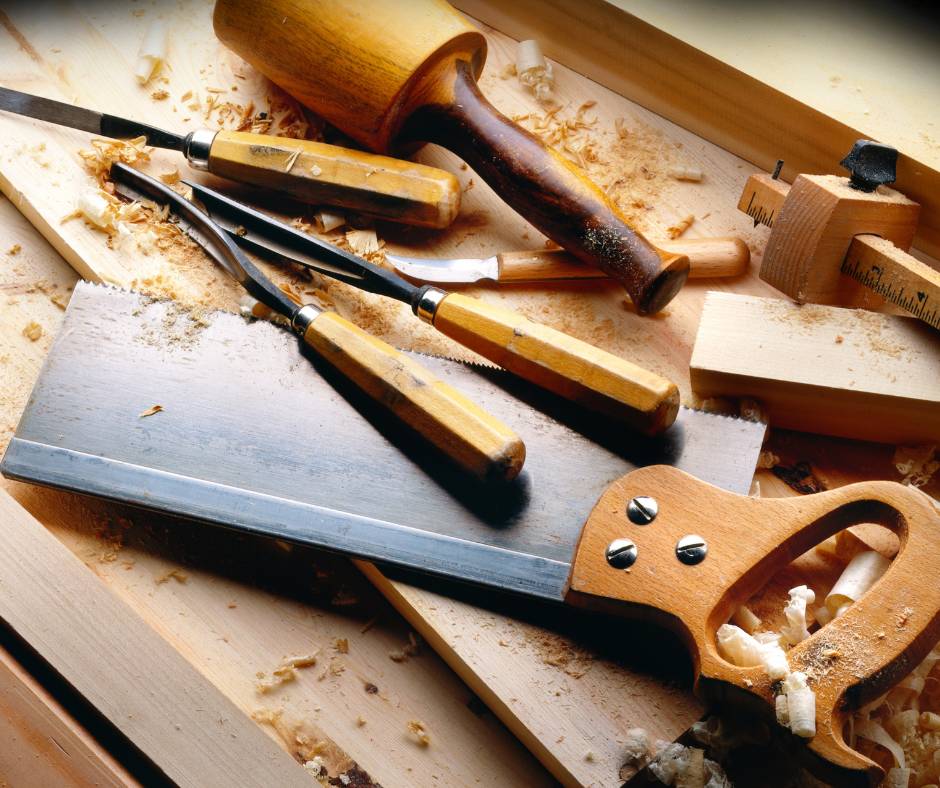
In addition to the materials, you’ll also need a set of basic tools to build your composter. These tools may include a saw, drill, screwdriver, hammer, measuring tape, and a level. The specific tools you’ll need will depend on the construction plans or instructions for your chosen composter design. It’s important to have these tools on hand before you begin construction to ensure that the process goes smoothly and efficiently. If you don’t already have these tools, consider borrowing them from a friend or family member, or consider investing in a basic set that will come in handy for future DIY projects as well.
Additional equipment for regular maintenance
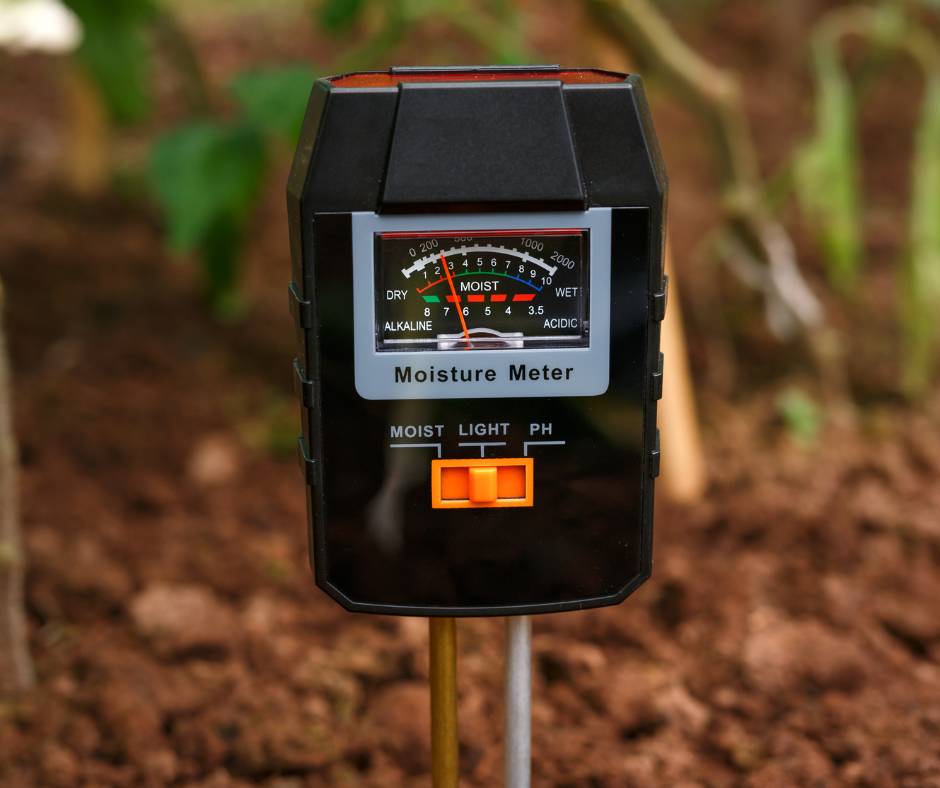
Once your composter is built and in use, there are a few additional equipment items that can be helpful for regular maintenance. These may include a compost thermometer to monitor the internal temperature of your compost pile, a compost turning tool or pitchfork to aerate the compost and mix the materials, and a compost moisture meter to monitor the moisture content of your compost pile. While these tools are not necessary for every composting system, they can be helpful for those who want to fine-tune their composting process and ensure optimal conditions for decomposition.
Choosing Your Composter Design
Basket-style composter
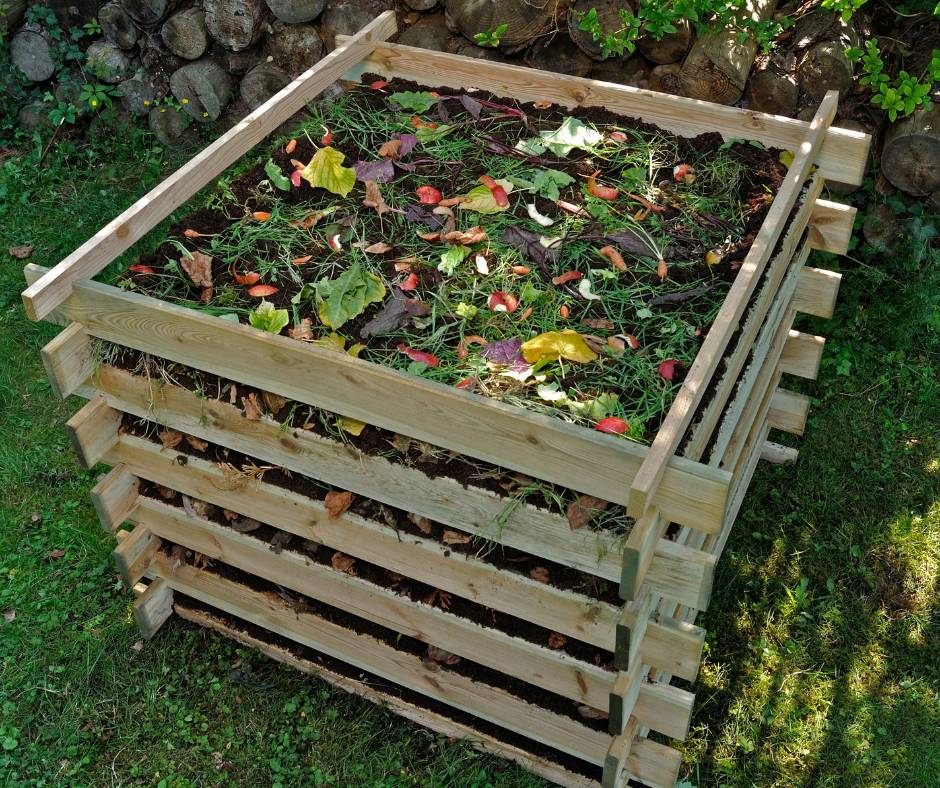
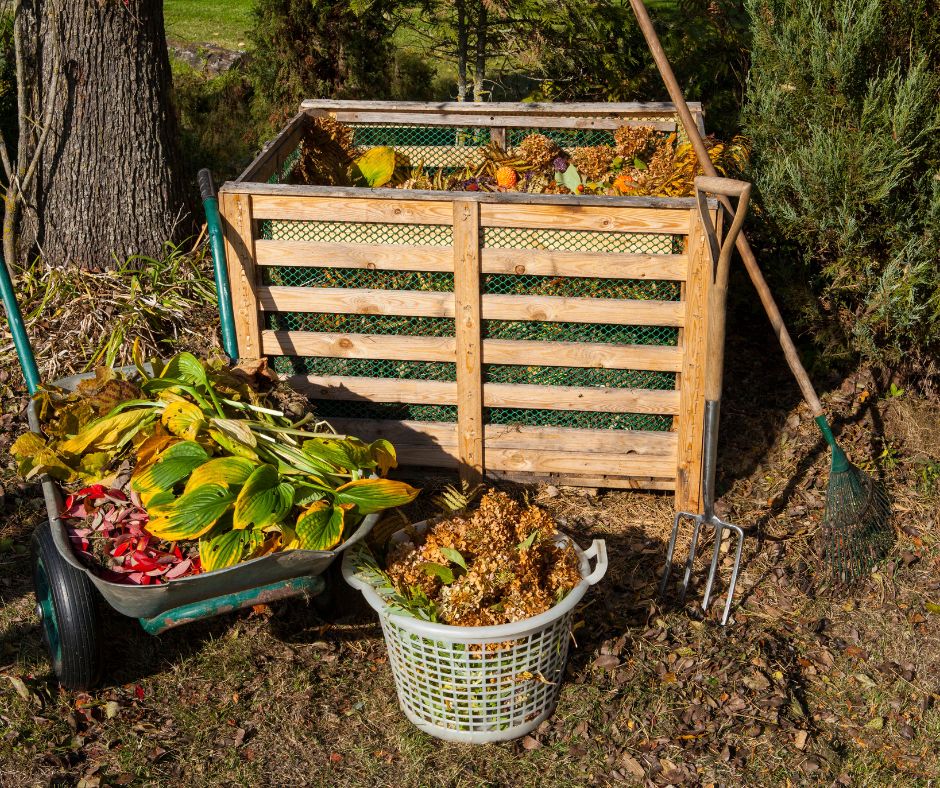
Basket-style composters, also known as static pile composters, are one of the simplest and most affordable types of composters to build or purchase. They consist of a basic structure, usually made of wood or plastic, with open sides and a removable lid or cover. Basket-style composters work by stacking organic materials in layers within the basket, allowing them to decompose naturally over time. These composters are a good option for those with limited space or who want a low-maintenance composting system. However, they may not be as efficient as other types of composters in terms of decomposition speed.
Tumbler-style composter

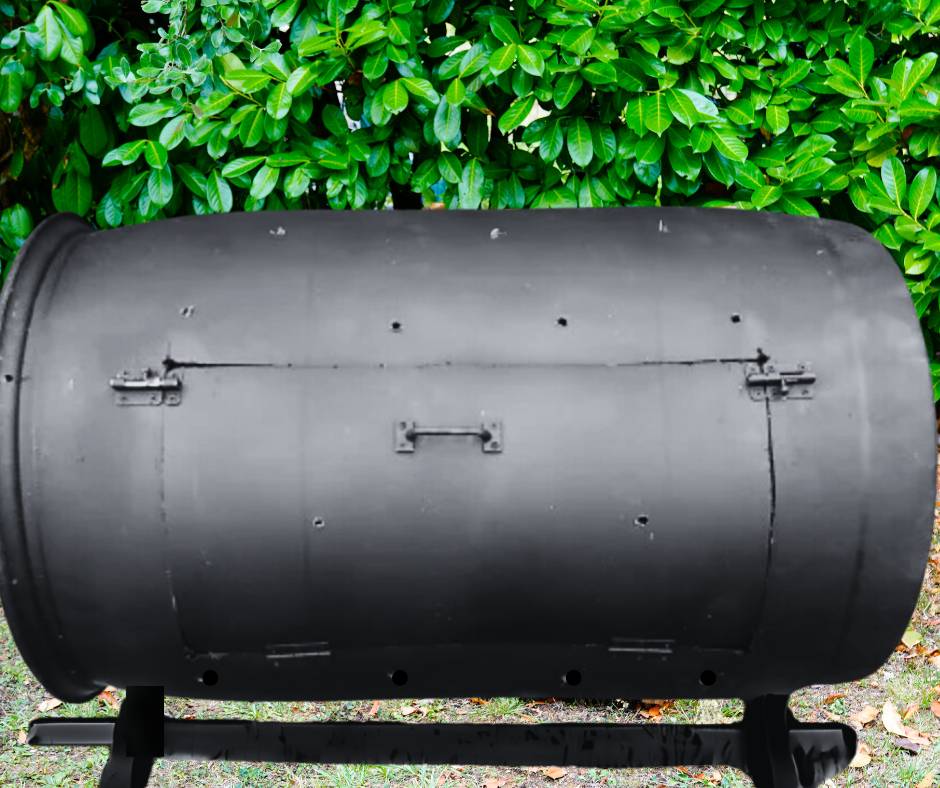
Tumbler-style composters, as the name suggests, are designed to be turned or rotated, which helps to aerate the compost and speed up the decomposition process. These composters consist of a barrel or drum that is mounted on a frame and can be rotated manually or with the use of a crank or handle. Tumbler-style composters are a popular choice for those who want a convenient and efficient composting system. The turning action helps to mix the organic materials, ensure even decomposition, and speed up the production of finished compost. These composters also tend to retain heat well, which can further accelerate decomposition.
Bin-style composter
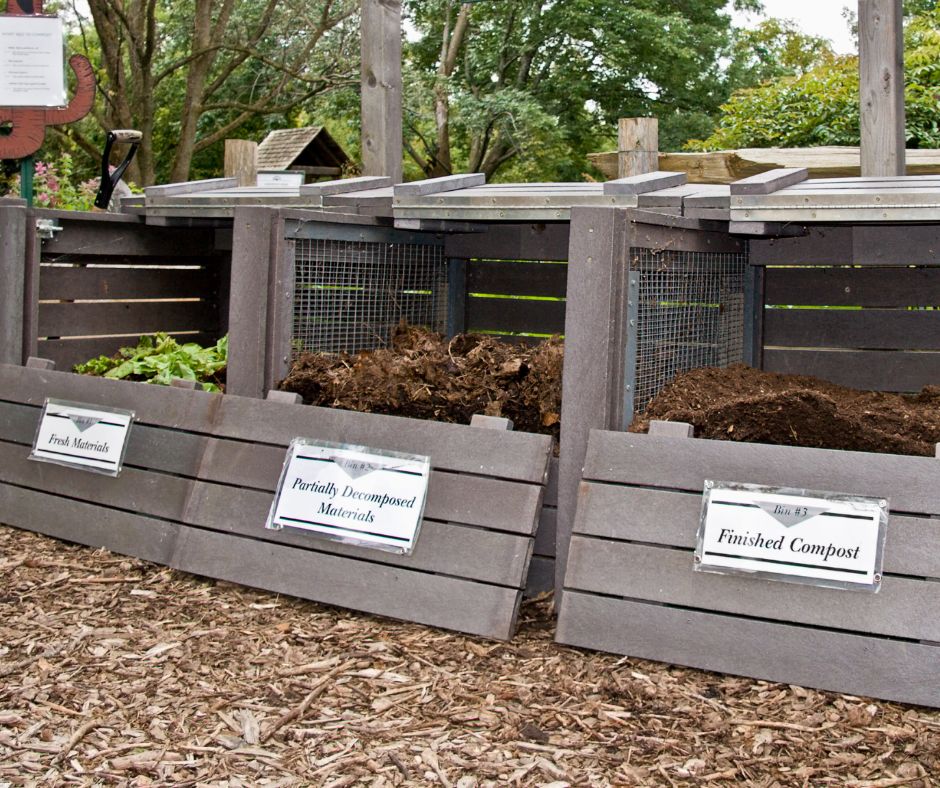
Bin-style composters are typically made up of several compartments or bins, allowing for a multi-stage composting process. These composters are often larger in size and can accommodate a larger volume of organic materials. The compartments or bins can be used for different stages of composting, such as filling, active decomposition, and curing. Bin-style composters are a great choice for those who generate a large amount of organic waste or who want to have a continuous supply of finished compost. By dividing the composting process into stages, these composters can help ensure that the compost is thoroughly decomposed before use.
Underground composter
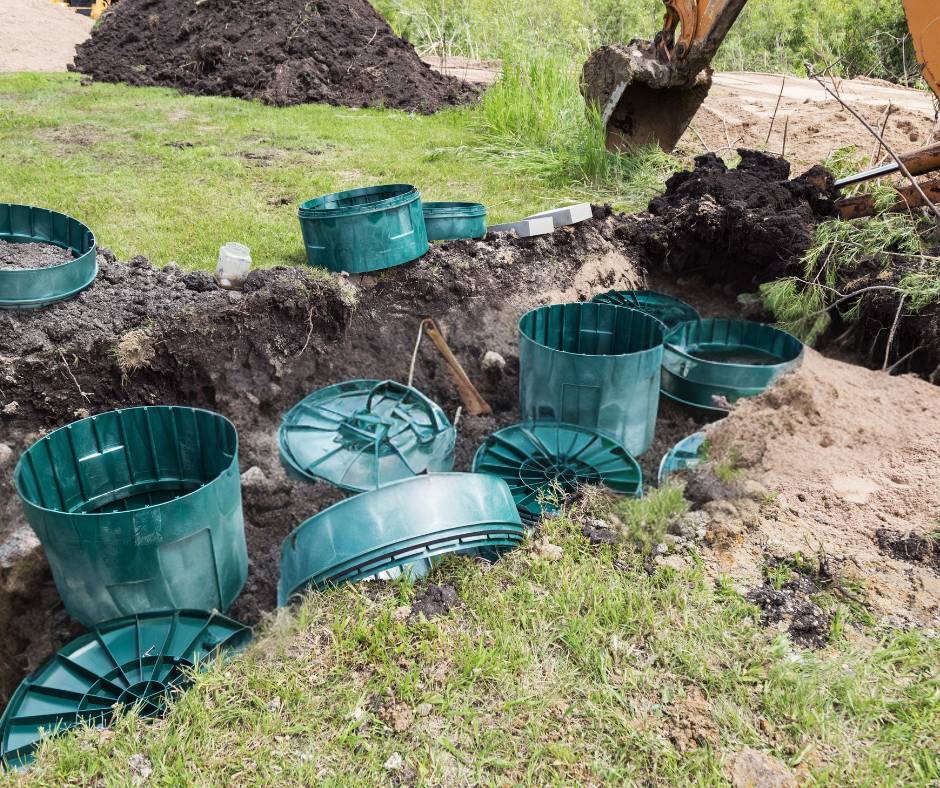
Underground composters are a unique and innovative option for those who want to compost without the visible presence of a compost bin or pile. These composters are installed below ground level and consist of a series of chambers or tubes that allow for the decomposition of organic materials. The underground design helps to conserve space and reduce odors, making it a great option for those with smaller yards or who want a discreet composting system. However, underground composters may require more effort to construct and maintain, as well as additional precautions to prevent the buildup of harmful gases.
Building A Basket-Style Composter
Requirements for building
To build a basket-style composter, you’ll need the following materials:
- Four wooden posts or planks for the corners of the basket
- Wooden boards or wire mesh for the sides of the basket
- Hinges, screws, or nails for assembly
- Optional: a removable lid or cover for the top of the basket
You’ll also need the following tools:
- Saw
- Drill
- Screwdriver or hammer
- Measuring tape
- Level
Step-by-Step Construction Guide
- Start by measuring and marking the desired size and height of your composter. This will depend on the amount of space you have available and the volume of organic waste you plan to compost.
- Cut the wooden posts or planks to the desired length, ensuring that they are all the same size. These will serve as the corners of the basket.
- Secure the wooden posts or planks together to form the frame of the basket. Use screws, nails, or hinges to attach the corners securely.
- Measure and cut the wooden boards or wire mesh to the appropriate size for the sides of the basket. These will allow air to circulate freely and aid in the decomposition process.
- Attach the sides of the basket to the frame, using screws, nails, or hinges to secure them in place. Ensure that there are no gaps or openings that could allow compost to spill out.
- Optional: Attach a removable lid or cover to the top of the basket. This will help keep rainwater out and prevent pests from accessing the compost.
- Place the completed basket-style composter in the desired location, ensuring that it is level and stable. Fill it with a mixture of green and brown compost materials, such as kitchen scraps, yard waste, and shredded paper.
- As the organic materials decompose, continue adding additional layers to the basket. Be sure to turn the compost occasionally to promote even decomposition and to mix the materials.
- Over time, the organic materials will break down into rich, fertile compost that can be used to improve the health and fertility of your garden soil.
Constructing A Tumbler-Style Composter
Materials needed
To build a tumbler-style composter, you’ll need the following materials:
- A large barrel or drum with a removable lid
- A sturdy frame or base to support the barrel
- Hinges, screws, or bolts for assembly
- Optional: a crank, handle, or turning mechanism for rotating the barrel
You’ll also need the following tools:
- Saw
- Drill
- Screwdriver or wrench
- Measuring tape
- Level
Step-by-Step Construction Guide
- Start by selecting a large barrel or drum that will serve as the main body of your tumbler-style composter. Ensure that it is made of food-grade plastic or metal and has a removable lid for easy access.
- Measure and mark the desired height of your composter on the barrel. This will depend on the amount of organic waste you plan to compost and the available space in your chosen location.
- Cut an opening in the barrel, approximately one-third of the way from the bottom. This will serve as the loading port for adding organic materials to the composter.
- Attach the barrel to a sturdy frame or base that will support its weight and allow for easy rotation. Use hinges, screws, or bolts to secure the barrel to the frame, ensuring that it is level and stable.
- Optional: If desired, attach a crank, handle, or turning mechanism to the barrel. This will allow you to easily rotate the barrel and mix the compost materials inside.
- Place the completed tumbler-style composter in the desired location, ensuring that it has enough clearance to rotate fully. Fill it with a mixture of green and brown compost materials, leaving some room for the materials to move and mix as the barrel is rotated.
- Turn the composter regularly, rotating the barrel at least once a week to ensure that the compost materials are well mixed and aerated. This will help speed up the decomposition process and produce finished compost more quickly.
- As the organic materials break down, continue adding additional layers to the tumbler. It’s important to balance the ratio of green and brown compost materials to maintain optimal conditions for decomposition.
- Once the compost is fully decomposed and has a crumbly texture and earthy smell, it is ready to be used in your garden. Apply it to your plants as a soil amendment or top dressing to promote healthy growth and nourishment.
Constructing A Bin-Style Composter
Gathering the necessary materials
To construct a bin-style composter, you’ll need the following materials:
- Wooden boards, plastic panels, or wire mesh for the sides of the bins
- Metal or wooden posts for support
- Hinges, screws, or nails for assembly
- Optional: a removable lid or cover for each bin
You’ll also need the following tools:
- Saw
- Drill
- Screwdriver or hammer
- Measuring tape
- Level
Step-by-Step Construction Guide
- Begin by determining the number of compartments or bins you want to include in your bin-style composter. This will depend on the amount of organic waste you generate and the available space in your chosen location.
- Measure and cut the wooden boards, plastic panels, or wire mesh to the appropriate size for each bin. These will serve as the sides of the compartments.
- Cut the metal or wooden posts to the desired height, ensuring that they are all the same size. These will serve as the support posts for the bins.
- Secure the sides of the bins to the support posts, using hinges, screws, or nails to attach them securely. Ensure that there are no gaps or openings that could allow compost to spill out.
- Optional: Attach a removable lid or cover to each bin. This will help keep rainwater out and prevent pests from accessing the compost.
- Place the completed bin-style composter in the desired location, ensuring that it is level and stable. Fill each bin with a mixture of green and brown compost materials, layering them to promote even decomposition.
- As the organic materials decompose, continue adding additional layers to each bin. Be sure to turn the compost occasionally to promote even decomposition and to mix the materials.
- Once the compost is fully decomposed and has a crumbly texture and earthy smell, it is ready to be used in your garden. Apply it to your plants as a soil amendment or top dressing to provide essential nutrients and enhance overall soil health.
Creating An Underground Composter
Materials required
To create an underground composter, you’ll need the following materials:
- Large plastic or metal pipes or tubes with removable caps or covers
- A shovel or digging tool to excavate the ground
- Drainage materials, such as gravel or rocks
- Compost materials, including green and brown organic waste
- Optional: a composting liner to help contain the organic materials
Step-by-Step Construction Guide
- Begin by selecting a location for your underground composter. This should be an area of your yard with ample space and good drainage.
- Use a shovel or digging tool to excavate a hole in the ground that is large enough to accommodate the size and number of pipes or tubes you plan to use. The hole should be deep enough to allow for composting below the surface.
- Place a layer of drainage materials, such as gravel or rocks, at the bottom of the hole. This will help facilitate proper drainage and prevent the composter from becoming waterlogged.
- Insert the pipes or tubes into the hole, ensuring that they are positioned securely and evenly. The number of pipes or tubes you use will depend on the amount of organic waste you generate and the desired capacity of your composter.
- Optional: If desired, line the inside of the pipes or tubes with a composting liner. This will help contain the organic materials and prevent them from coming into direct contact with the soil.
- Begin adding organic waste to the pipes or tubes, layering green and brown materials to promote optimal decomposition. Be sure to balance the ratio of green and brown compost materials to maintain a healthy composting environment.
- Cap or cover each pipe or tube with a removable cap or cover. This will help keep rainwater out and prevent pests from accessing the compost.
- As the organic materials decompose, continue adding additional layers to the pipes or tubes. Over time, the compost will break down into rich, fertile soil that can be used to improve the health and fertility of your garden.
- Periodically check the composting tubes or pipes to monitor the progress of the decomposition process. If necessary, turn or mix the compost to ensure even decomposition and to speed up the production of finished compost.
Maintaining Your Composter

Balancing green and brown compost materials
One of the keys to successful composting is finding the right balance between green and brown compost materials. Green materials are rich in nitrogen and include things like fruit and vegetable scraps, coffee grounds, and fresh grass clippings. Brown materials are rich in carbon and include things like dried leaves, straw, and shredded paper. To maintain a healthy composting environment, it’s important to add a roughly equal amount of green and brown materials to your compost pile. This will help promote decomposition and prevent any unpleasant odors or imbalances in the compost.
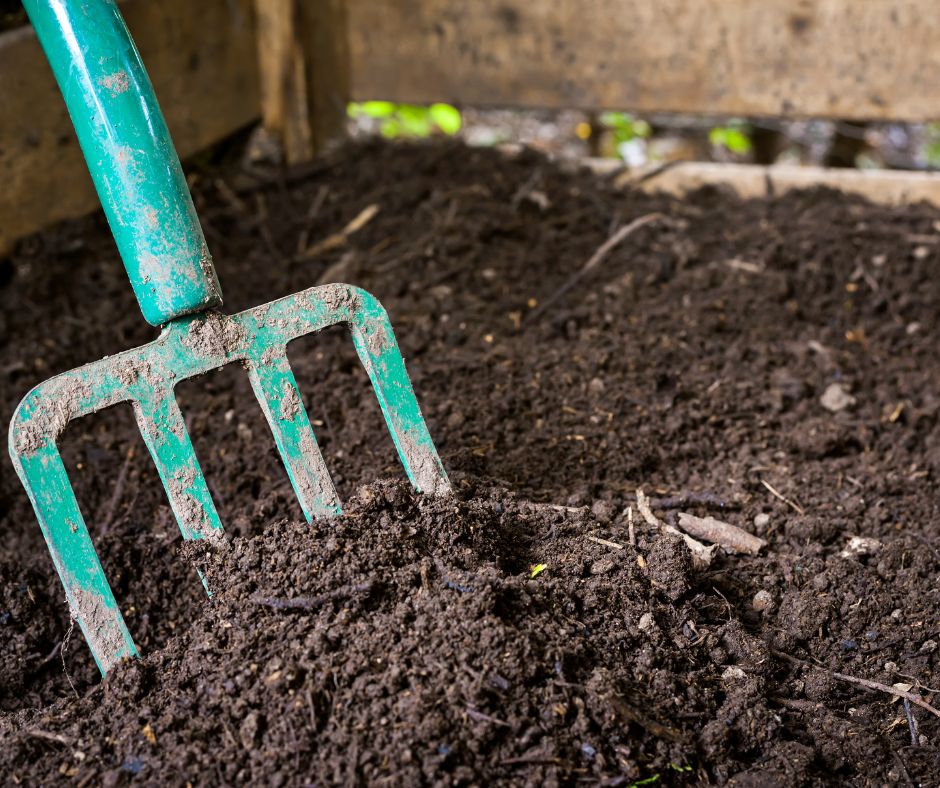
Turning the compost for aeration
Aerating your compost pile is an essential part of maintaining optimal conditions for decomposition. Turning the compost helps to introduce oxygen into the pile, which is necessary for the breakdown of organic materials. You can turn your compost using a pitchfork, compost turning tool, or simply a shovel. The frequency of turning will depend on the size and stage of your compost pile, but as a general rule, turning once every one to two weeks is recommended. By regularly turning your compost, you’ll help speed up the decomposition process and create a more consistent and even distribution of compost materials.
Moisture control
Moisture is another important factor to consider when maintaining your composter. The ideal moisture level for compost is similar to that of a wrung-out sponge – damp but not overly wet. If your compost is too dry, decomposition will slow down, so it’s important to add water to keep it moist. If your compost is too wet, it may become waterlogged and begin to smell. In this case, you can add dry brown materials, such as shredded paper or dried leaves, to help absorb excess moisture. Regularly monitor the moisture level of your compost and adjust as needed to ensure optimal conditions for decomposition.
Identifying and dealing with composter issues
While composting is a relatively straightforward process, issues can sometimes arise that may require your attention. Common issues include foul odors, a slimy or mushy texture, or the presence of pests. Foul odors are often a sign of anaerobic decomposition, which occurs when the compost lacks oxygen. To remedy this, turn the compost to introduce more oxygen and consider adding more dry brown materials to absorb excess moisture. A slimy or mushy texture can indicate an imbalance in the compost, usually too much green material. Add more brown material to restore the balance. If pests, such as flies or rodents, are attracted to your compost, bury the fresh kitchen scraps deep in the pile or consider covering the compost with a layer of soil. Regular monitoring and quick action can help prevent and address these issues, ensuring that your compost remains healthy and productive.
Using Your Compost
When is compost ready to use?
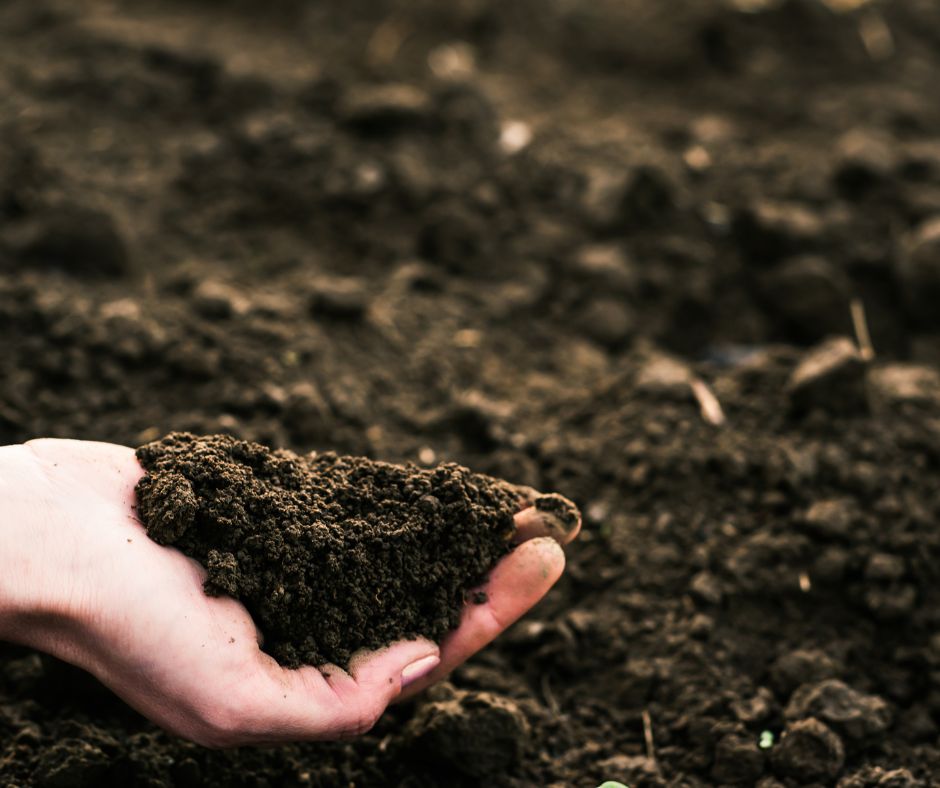
Knowing when your compost is ready to use is an important part of the composting process. Finished compost should have a crumbly texture and a dark color, similar to rich, fertile soil. It should have a pleasant, earthy smell and be free of any recognizable organic materials.
The composting process can take anywhere from a few months to a year or more, depending on the size and composition of your compost pile, as well as the conditions in your environment. To determine if your compost is ready, you can perform a simple “sieve test” – pass the compost through a fine-mesh sieve or screen to remove any remaining large or uncomposted materials. If the compost easily passes through the sieve, it is likely ready to use.
Uses of compost in your garden
Compost is a valuable resource that can be used in a variety of ways to improve the health and fertility of your garden. One of the most common uses for compost is as a soil amendment. Simply mix the compost into your existing garden soil to enhance its structure, improve water retention, and increase nutrient availability.
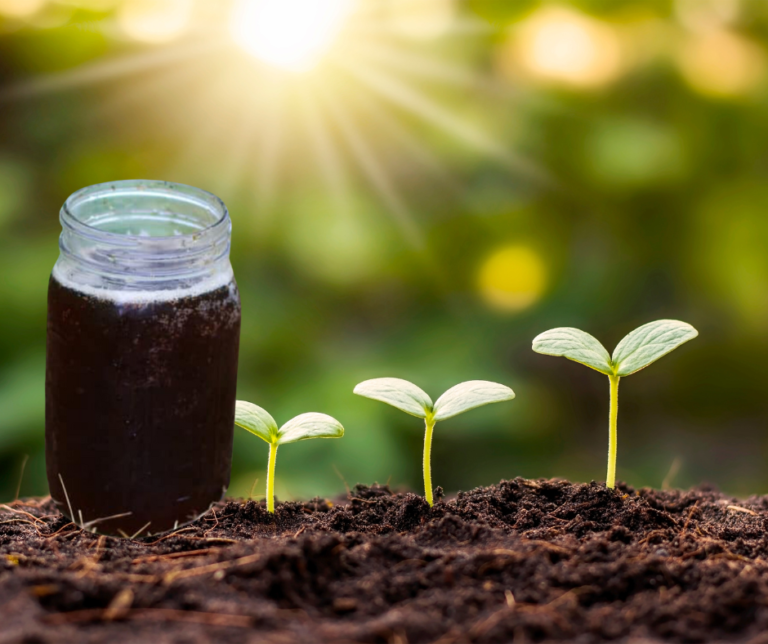
Compost can also be used as a top dressing around your plants to provide a slow-release source of nutrients and help suppress weeds. Another option is to create compost tea by steeping compost in water and using the resulting liquid as a natural fertilizer for your plants.
Whatever the specific use, incorporating compost into your garden will help promote healthier, more productive plants and contribute to overall soil health.
Storing extra compost
If you find that you have more compost than you can currently use in your garden, there are a few options for storing the excess.
One option is to simply leave the compost in your composter until you are ready to use it. As long as the compost remains covered and well-maintained, it will continue to break down slowly over time.
Another option is to transfer the excess compost to a storage bin or container, such as a plastic or metal bin with a lid. This will help keep the compost contained and protected from the elements.
When storing compost, it’s important to keep it in a dry, well-ventilated area to prevent the growth of mold or fungi. With proper storage, your excess compost can be safely stored until you are ready to utilize it in your garden.
In Conclusion
Composting is a rewarding and eco-friendly way to reduce waste, enrich your soil, and promote a healthier environment. By understanding the basics of composting, choosing the right location for your composter, gathering essential materials and tools, and selecting the appropriate composter design, you’ll be well on your way to building and maintaining a successful composting system.
Whether you choose a basket-style, tumbler-style, bin-style, or underground composter, the key is to maintain a balance of green and brown materials, regularly turn and aerate your compost pile, monitor and adjust moisture levels, and address any issues that may arise. With time and patience, you’ll create nutrient-rich compost that can be used to nurture your garden and make a positive impact on the world around you. Happy composting!
Frequently Asked Questions